Game Genie Disassembly
NOTE: This was originally posted on a different blogging platform on April 8, 2016
The original Game Genie is a cheat device for the Nintendo Entertainment System that alters game data in real-time. Users must “program” the Game Genie to perform certain actions. They do this by entering codes into the interface that appears before the game they wish to alter.
Since the interface runs on the NES, it is also written in 6502 assembly, the programming language of the Nintendo Entertainment System.
I undertook a disassembly of the Game Genie ROM to see just how the creators went about programming their infamous cheat device.
To see the full code explained here, check out the repo: https://github.com/kevinselwyn/game-genie-disassembly

Note: My task wasn’t so much to disassemble the ROM (that part is easy), as much as it was to put the parts of the disassembled ROM in context (that part is hard).
The Basics of the Assembly
The ROM is made up of bytes of 6502 machine code that can also be represented in assembly language. Machine code like this:
A9 01 8D 16 40 A9 00 8D 16 40 A0 08 AD 16 40 6A 26 07 88 D0 F7 A0 08 AD 17 40 6A 26 08 88 D0 F7 60
Can be written in assembly as:
  LDA #$01
  STA $4016
  LDA #$00
  STA $4016
  LDY #$08
  LDA $4016
  ROR A
  ROL $07
  DEY
  BNE $F068
  LDY #$08
  LDA $4017
  ROR A
  ROL $08
  DEY
  BNE $F073
  RTS
33 bytes of machine code translate into 17 instructions of assembly code, the latter being easier on the eyes, more concise, and simpler to debug.
The result is a set of instructions that contain mnemonics for CPU instructions. LDA means to LoaD the Accumulator register with whatever follows. Or DEcreasing the Y register (DEY). Operands can be actual values, addresses in memory, the accumulator register itself, or have none at all (depending on the particular instruction).
Together, all these instructions make up the ROM and are what I will be poring over.
The Anatomy of the ROM
The Game Genie ROM is 24592 bytes and breaks down as follows:
| Name    | Size (bytes) |
|---------|--------------|
| Header  | 16           |
| PRG ROM | 4096 (x4)    |
| CHR ROM | 8192         |
The Header is 16 bytes of data that contains information useful to emulators, so will be (almost) ignored in the disassembly process.
The PRG ROM is the actual game code. On the Game Genie, the core code is repeated 4 times. So the total size is 16384 bytes, but we are only concerned with 1/4 of that.
The CHR ROM is the character data that contains graphics tiles that can be displayed in the background and in sprites.
The Disassembly
The heavy lifter in the process of translating machine code into assembly code was py65, a 6502 simulator written in Python. It comes with a utility called py65mon, an interactive monitor that can be used to load a ROM and disassemble it.
First we load it in at offset 0xBFF0. The PRG ROM starts at offset 0x10, so we account for this by loading it in at 0xC000 - 0x10. The CHR ROM is cropped off as a result, but is unneeded at this point.
.load gamegenie.nes BFF0
?Wrote +16400 bytes from $bff0 to $ffff
       PC  AC XR YR SP NV-BDIZC

6502: 0000 00 00 00 ff 00110000
From there, it’s easy as:
.disassemble F000:FFFF

$f000  78        SEI
$f001  d8        CLD
$f002  a9 00     LDA #$00
...
2157 lines later, and our disassembly is complete! Told you it would be easy.
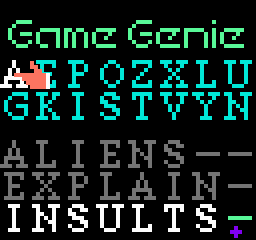
The Graphics
The CHR ROM was recreated by looking at the PPU (Picture Processing Unit) data in an emulator. The graphics are extremely simple:
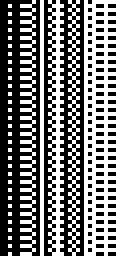
This image was converted back into CHR data using a utility I wrote: img2chr.
The Reassembly
I’m using a (slightly modified) version of nesasm to reassemble the ROM to see if we end up back at the same data as the source ROM.
nesasm lets you include external source files or binary data, allowing developers to separate components of a project for greater abstraction and readability.
Here is our project structure:
game-genie-disassembly/
  bank.asm       # Our program code to be duplicated 4 times
  constants.asm  # Unchanging registers, values, and offsets
  gamegenie.asm  # Main file
  gamegenie.png  # CHR data in PNG format
  variables.asm  # Variable aliases
Other files are included build build purposes, but these are the files we will break the ROM into for reassembly.
The Breakdown
To make things easier to read/understand, I replaced all zero-page variables ($00-$FF) with variable names (variable_00-variable_FF). This will make it easier to swap out the ambiguous variable names later when I find out what they do or what data they hold.
Next, I chunked the code according to a few constraints. A new block was formed if:
- A RTS instruction is found (ReTurn From Subroutine). That’s a pretty clear indication that the code that came before was part of a subroutine
- A JMP instruction is found (JuMP to address). The chunk doesn’t necessarily come at the JMP, but rather, at the destination address.
- Data is encountered. If instructions start to look weird, it’s a pretty good chance we found a section of data.
Let’s look at a subroutine chunk:
$f01e a2 60 LDX #$60
$f020 a0 08 LDY #$08
$f022 ca DEX
$f023 d0 fd BNE $f022
$f025 88 DEY
$f026 d0 fa BNE $f022
$f028 60 RTS
Let’s clean it up and add a label before offset $F022 for the BNE (Branch on Not Equal to zero) instructions:
  LDX #$60
  LDY #$08
label:
  DEX
  BNE label
  DEY
  BNE label
  RTS
Now, let’s look at a data chunk:
$f83a 85 63 STA $63
$f83c a5 52 LDA $52
$f83e 85 62 STA $62
$f840 68 PLA
$f841 a8 TAY
$f842 60 RTS
$f843 19 19 19 ORA $1919,Y
$f846 19 1a 19 ORA $191a,Y
$f849 19 19 19 ORA $1919,Y
$f84c 1a ???
$f84d 19 19 19 ORA $1919,Y
$f850 19 1a 19 ORA $191a,Y
$f853 19 19 19 ORA $1919,Y
$f856 1a ???
Notice that for the first 6 lines, the instructions look normal. After that, things start to get weird. A lot of successive ORA (Logical OR with Accumulator) instructions are not normal, and neither are the ??? instructions. Also, we can notice a sort of pattern in the 8 remaining (incorrectly disassembled) instructions. The instructions should look like:
  STA <variable_63
  LDA <variable_52
  STA <variable_62
  PLA
  TAY
  RTS
data:
  .db $19, $19, $19, $19
  .db $1A
  .db $19, $19, $19, $19
  .db $1A
  .db $19, $19, $19, $19
  .db $1A
  .db $19, $19, $19, $19
  .db $1A
The Labeling
A great starting point in creating labels that have some context is by looking at the vectors in the ROM.
3 16-bit vectors occur starting at offset $FFFA:
| Vector | Offset |
|--------|--------|
| NMI    | $FFFA  |
| RESET  | $FFFC  |
| IRQ    | $FFFE  |
When the ROM boots, the CPU looks at these vectors (mainly the RESET vector) to tell it which address to jump to in the ROM at the start of execution.
The NMI vector is the address the CPU jumps to during every Non-Maskable Interrupt (usually run once every frame).
The IRQ vector is unused in this ROM. It is usually set to $0000 if unused, but is set to $FFFF in this case.
At the end of the Game Genie ROM, we have these disassembled instructions:
$fffa 7d f0 00 ADC $00f0,X
$fffd f0 ff BEQ $fffe
$ffff ff ???
If we weren’t savvy to the vector locations to begin with, the strange “instructions” here would raise a red flag. Disassembled correctly:
NMI_vector:
  .db $7D, $F0

RESET_vector:
  .db $00, $F0

IRQ_vector:
  .db $FF, $FF
It’s worth noting that vectors (and many other 16-bit addresses are stored backwards. Meaning that the high byte appears second and the low byte first.
The RESET vector is actually $F000: the start of the last $1000-sized bank.
nesasm can help us out with this by storing it as a word (16-bit value) with .dw instead of a byte (8-bit value) with .db:
NMI_vector:
  .dw $F07D

RESET_vector:
  .dw $F000

IRQ_vector:
  .dw $FFFF
Much easier to read when following jumps in the source.
The Variables
By default, all zero-page variables ($00-$FF) were named variable_00-variable_FF. The ones where I could derive context were changed. Note the following snippet:
$f08c ad 45 00 LDA $0045
$f08f 8d 05 20 STA $2005
$f092 ad 46 00 LDA $0046
$f095 8d 05 20 STA $2005
Based on what we know about $2005, the scroll register, it needs to be written to twice: once for the X scroll position and one more for the Y scroll position. It stands to reason that the variables right before each write to $2005 correspond to 2 variables that store those positions.
After rewriting:
  LDA scroll_x
  STA $2005
  LDA scroll_y
  STA $2005
The Final ROM
This is the entirety gamegenie.asm the file that will compile into the final ROM:
  .inesprg 1 ; 1 16KB PRG ROM
  .ineschr 1 ; 1 8KB CHR ROM
  .inesmir 1 ; Vertical Mirroring
  .inesmap 0 ; Mapper 0

  .bank 0
  .org $C000
  .incbin "bank.raw"
  .incbin "bank.raw"

  .bank 1
  .org $E000
  .incbin "bank.raw"
  .incbin "bank.raw"

  .bank 2
  .org $0000
  .incbin "gamegenie.chr"
The first 4 lines are iNES directives that set values in the header used for emulators:
- inesprg - Sets the number of 16KB PRG ROMs. In this case, only 1.
- ineschr - Sets the number of 8KB CHR ROMs. Only 1 here as well.
- inesmir - Sets the nametable mirroring. Useful for scrolling, so relatively pointless here.
- inesmap - Sets the mapper number. 0 means no memory mapper is being used.
bank.raw is included 4 times because the main source is so small and must be repeated to fill out the 1 16KB PRG ROM space. Including the source 4 times creates duplicate label errors, so nesasm is used beforehand to compile just the 4KB bank once and then it is included 4 times in the final source code to compile the final ROM.
Final Thoughts
How much did you learn?
Not much, really. I learned a lot about how to successfully disassemble a NES ROM, but precious little about what the code is actually doing. I managed to catch a glimmer of context at the beginning of the ROM (startup, config, etc.), but after that, it gets pretty esoteric.
Why did you do this?
I’ve always wanted to disassemble a NES ROM. The file size is daunting, but the Game Genie ROM is small and on top of that, the main code is just repeated a few times to fill out the size. It was not very time intensive, so it’s a good starting point for larger ROMs.
What was the most interesting takeaway?
I didn’t realize until I was almost done that, essentially, the Game Genie was an unlicensed NES game; that is, a game not made with Nintendo’s blessing. It’s amazing to see snippets of code that I’ve seen in other licensed NES games, as well as my own NES programming projects where the conventions were arrived at naturally.
Check out the full code in the repo here: https://github.com/kevinselwyn/game-genie-disassembly